Follow the steps below to ensure you always receive invitations, newsletters, and important notices and reminders from University Advancement. When you “whitelist” our email, you are letting your email provider know that you approve our domain as a trusted communications source. We’ve also included step-by-step instructions to make sure Advancement emails appear in your primary or focus tab, if that is your preference.
Questions? Please contact Jong Cambron.
Email platforms
Gmail
Apple Mail

Outlook
Yahoo! Mail

Gmail: Whitelisting
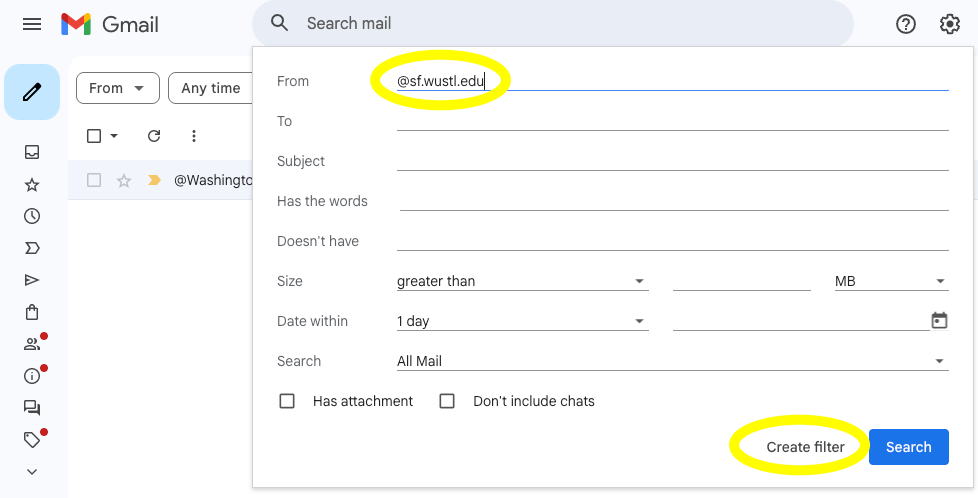
Step 1: Click the search bar option icon.

Step 2: Add WashU Advancement email to From field (@sf.wustl.edu), then click Create Filter.
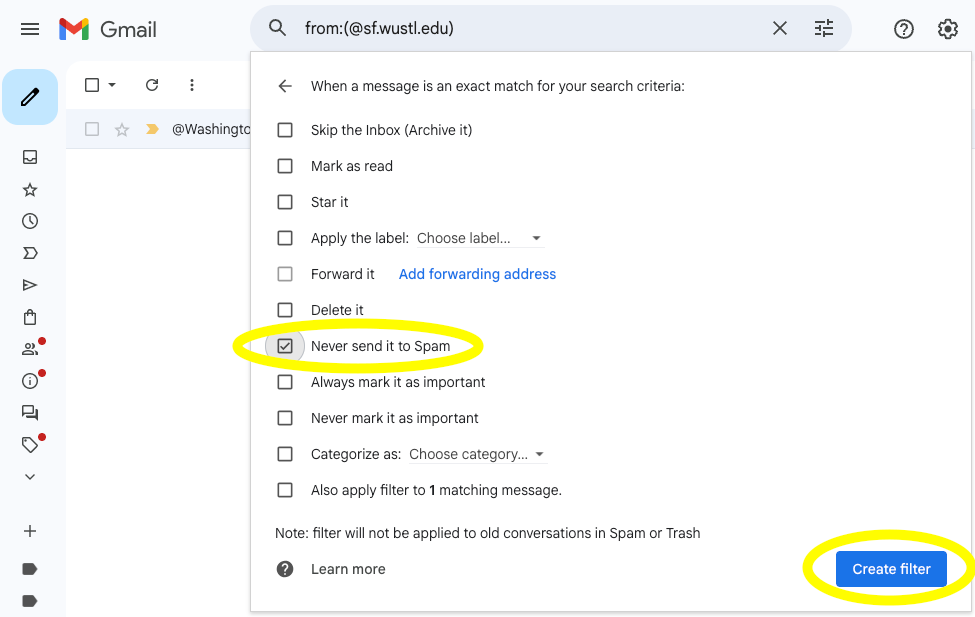
Step 3: Click Never send it to Spam option, then click Create Filter.
Gmail: Primary inbox
Step 1: Click the search bar option icon.
Step 2: Add WashU Advancement email to From field (@sf.wustl.edu), then click Create Filter.
Step 3: Click Categorize as: and select the Primary option, then click Create Filter.
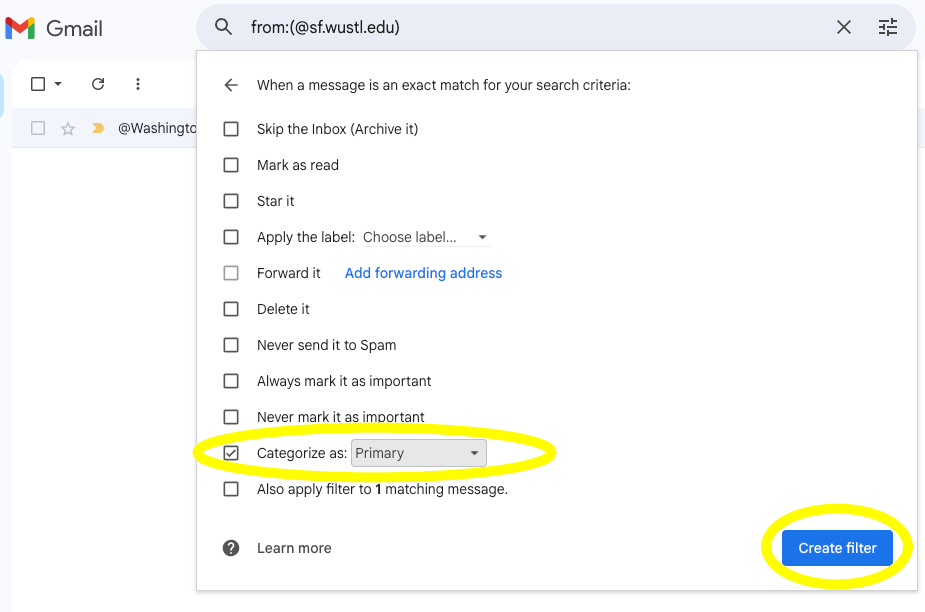
You can add @sf.wustl.edu to your Gmail whitelist and primary inbox at the same time by checking both the Never send it to Spam and Categorize as: Primary options
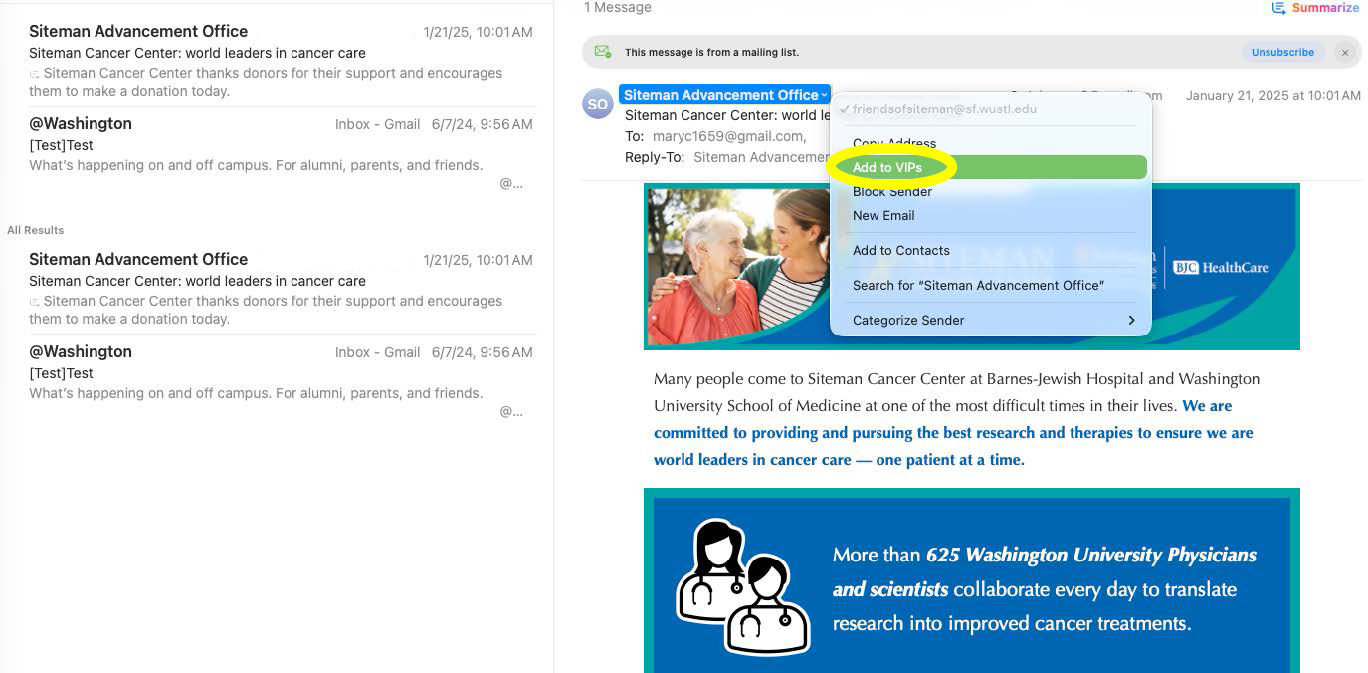
apple mail: Whitelisting
Step 1: Click the sender’s name to highlight it, then click the down carrot to open up options.
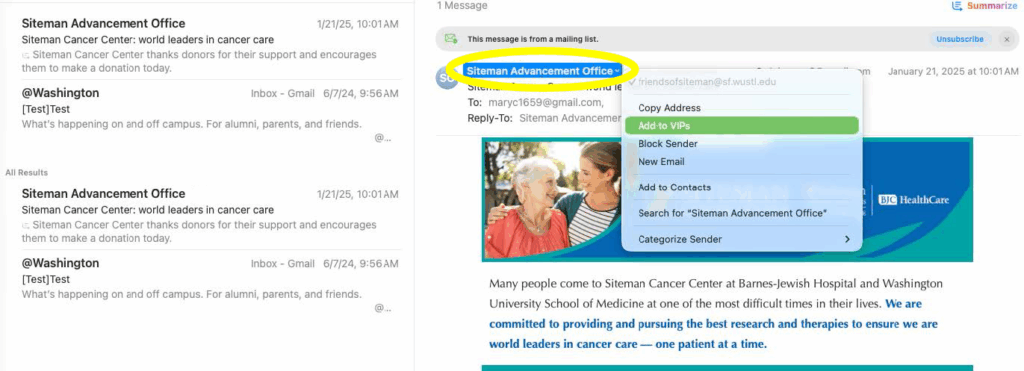
Step 2: Click on Add to VIPs (Once added as a VIP, future emails will automatically be delivered to both your inbox and VIP mailbox).
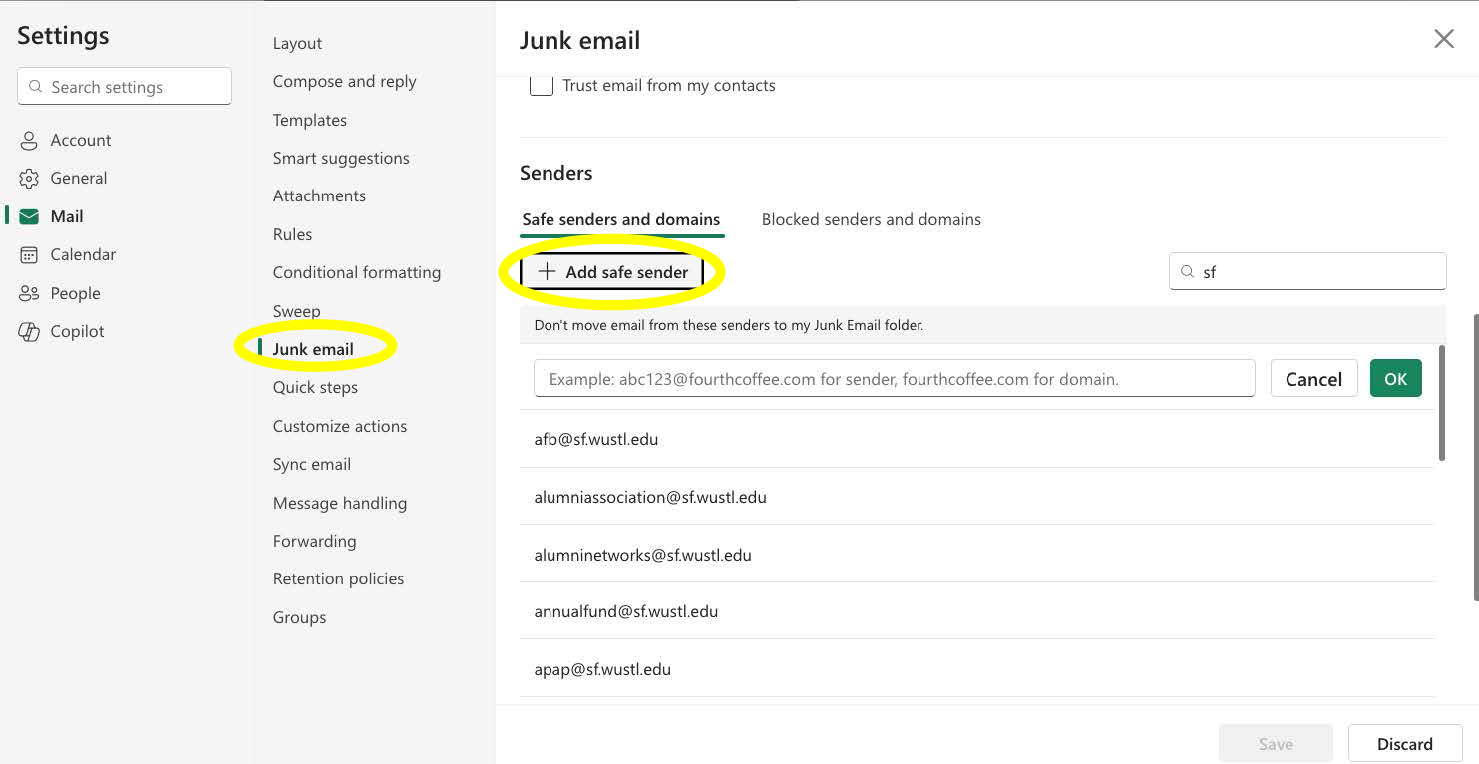
outlook: Whitelisting
Step 1: Click the gear icon to open email settings.

Step 2: Select Junk email tab, scroll down to Senders section and click +Add safe sender.
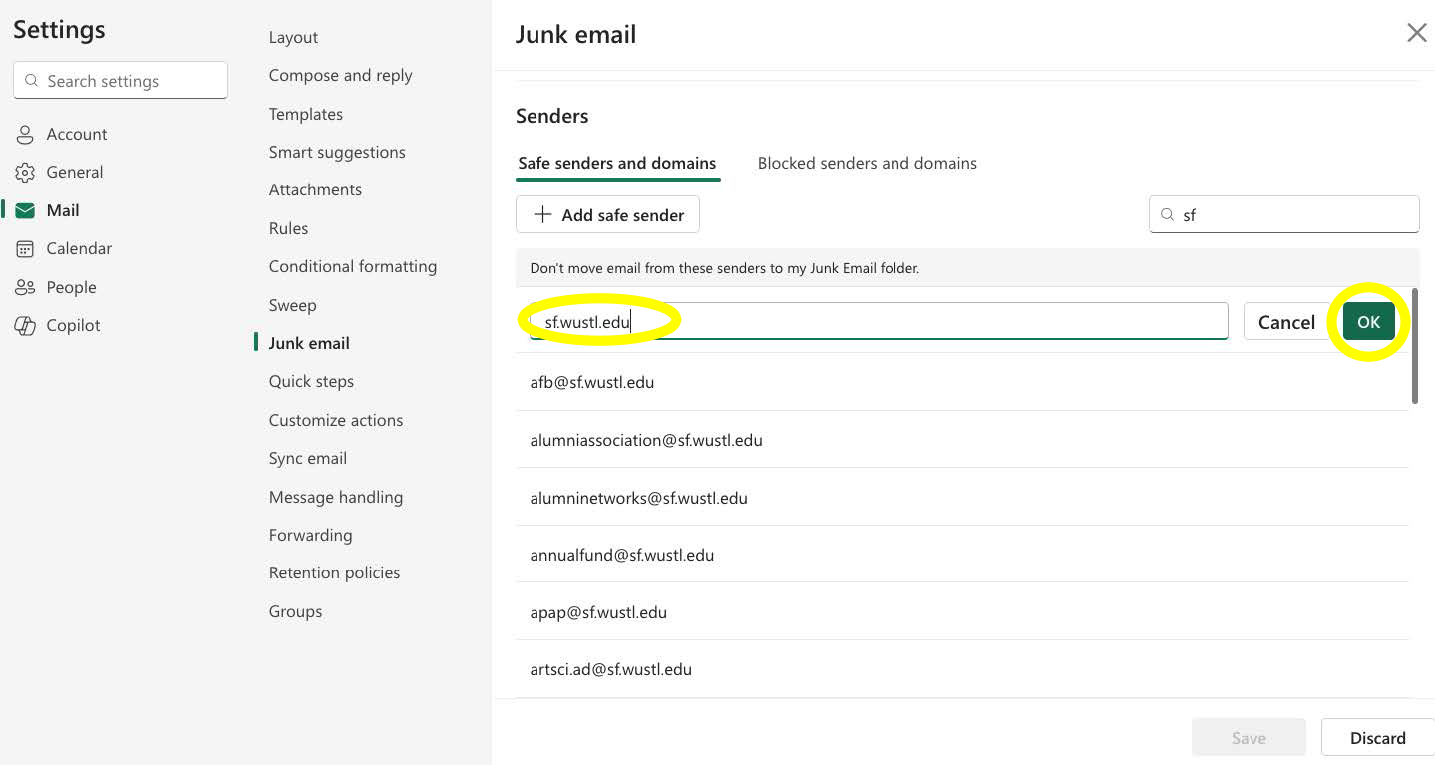
Step 3: Type sf.wustl.edu in the empty text box and then click OK.
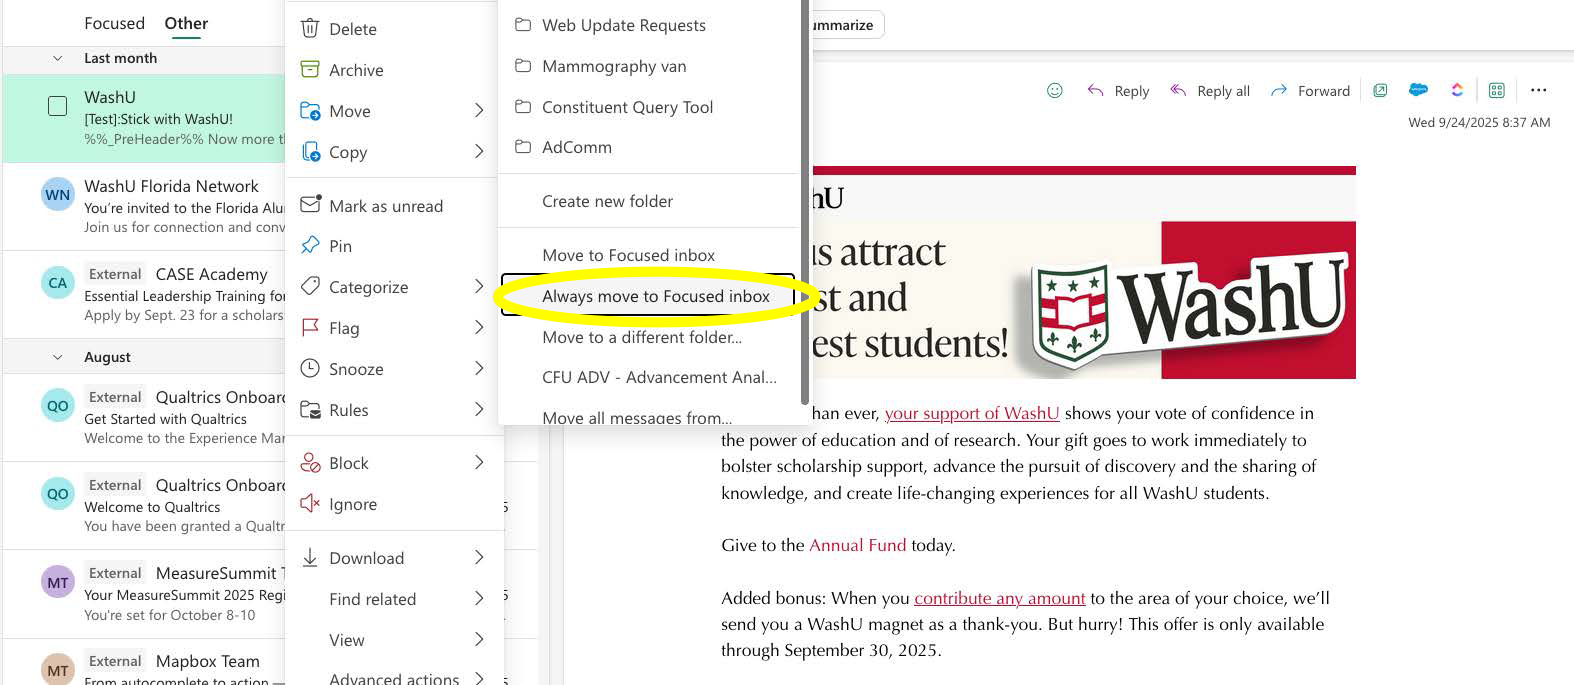
outlook: focus inbox
Step 1: Highlight a WashU email in your inbox, select the Other tab, and then right click to show options.
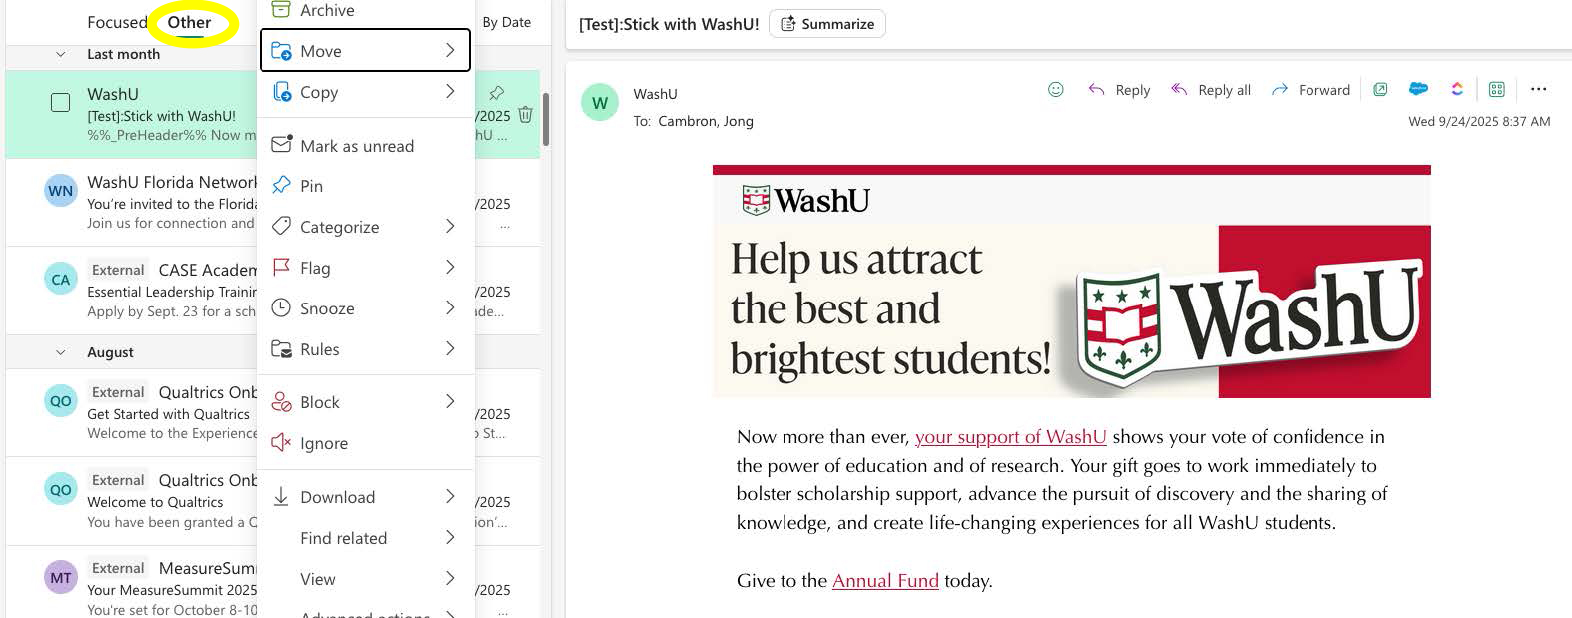
Step 2: Click on Move to view options and then select Always move to Focused inbox.
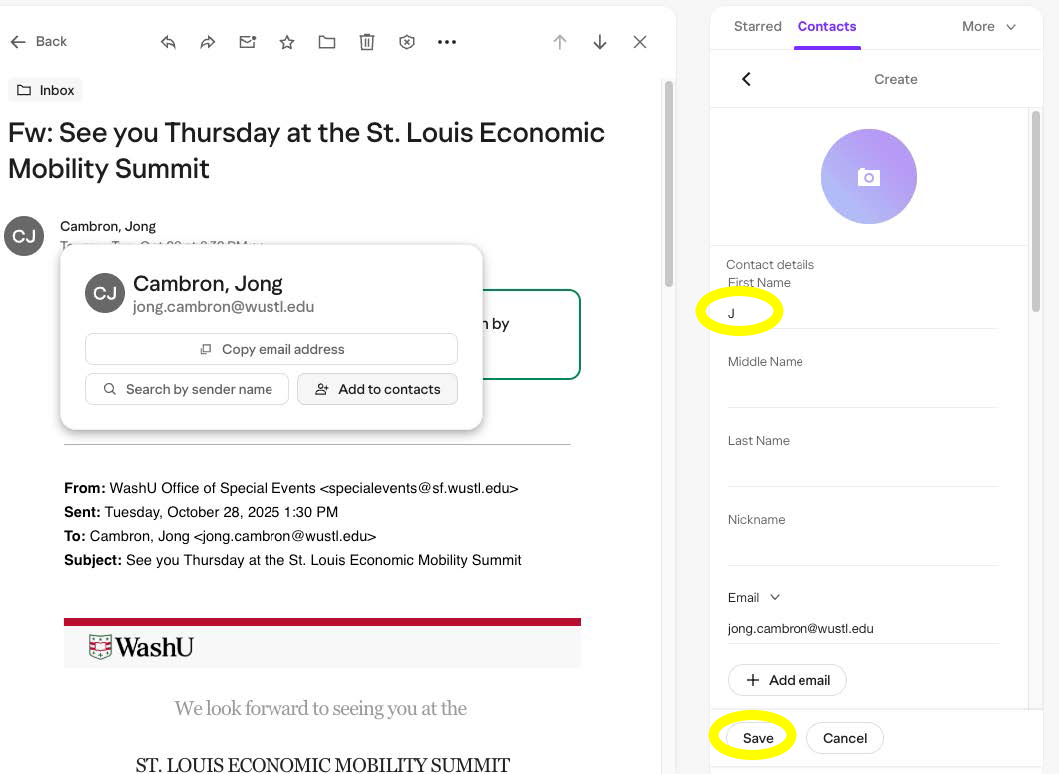
Yahoo! Mail: Whitelisting
Step 1: Hover over the sender’s name and click Add to contacts when a pop-up appears.
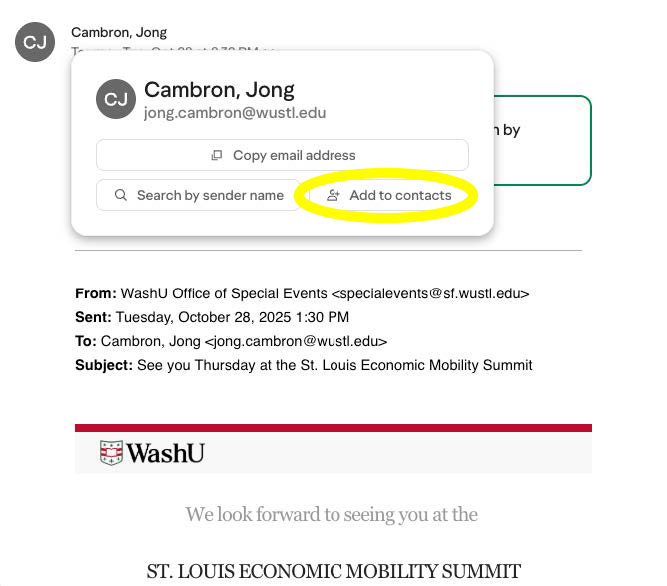
Step 2: Look for the Contacts box on the right side of your screen to add at least one name then click save.